xScope makes your workflow faster and more efficient:
Mirror: Create a secondary display
Screen real estate is at a premium on laptops. The Mirror tool can be used as a virtual secondary display in some cases to free up space on your laptop's display. For example, if you have a zoomed-out view of a Photoshop document that you want to keep an eye on while you edit in a zoomed-in view, or if you have a browser window with a web page you want to view while you edit the HTML or CSS.
- Launch the xScope Mirror app on your iOS device
- Connect to your laptop
- Select the browser window or window of your image editor that you want to display
- On your iOS device, position the image using the arrows so that it lines up with your device's screen
- Keep the image in that position by tapping on the lock icon
- Now on your laptop you can let that window move to the background as you work in a different window - a second view in your image editor or a text editor to work on code for the webpage. The first window will remain displayed in the Mirror tool on your iOS device, reflecting your changes as you work. (When working like this on a webpage, it will work best if the browser window refreshes automatically, using a tool such as Codekit.)
Screens: Post a design to Dribbble
When uploading a shot to Dribbble, it can sometimes be difficult to get it just right. But with xScope, sharing your work is a breeze:
- Open xScope Preferences and enable the Dribbble configuration in the Screens pane.
- Open the Screens tool
- Select the Dribbble Upload preset from the tool's dropdown menu
- Position the screens tool over the part of your design that you want to upload to Dribble
- Press the camera button to capture the image (by default the screenshot is copied to the clipboard, but you can change to a file in the General preferences pane)
- Upload your saved image to Dribbble, knowing exactly how it will look on the site
Dimensions: Grabbing pictures from a web page
xScope is great for taking screen grabs or snagging images that can't be dragged out of the browser window to your desktop (like on Flickr). Here's how we do it:
- Launch xScope and open the Dimensions tool
- Measure the image in question & make sure lasers cover the entire image
- Press ⇧⌘7 to copy the image to clipboard
- Switch over to Photoshop and make a new document
- Paste the clipping and save
Loupe: Check the alignment of UI elements
When you're building a new UI, it's important to align controls and other items with pixel-perfect accuracy. Here's a simple way to do it with xScope:
- Open Loupe tool
- Make the loupe window fairly large (500+ pixels with 800% zoom)
- Configure the loupe so it follows the mouse pointer
- Turn off the loupe's gridlines
- Hover over the areas of the UI that you want to check
- Use the centerlines to check placement
- If something is off, press ⌘L to lock the loupe
- Click on the zoomed pixels and draw a box to figure out how much adjustment is needed
Works great for a web page, Mac apps or an iOS app in the simulator.
Screens: Check an iPhone wallpaper
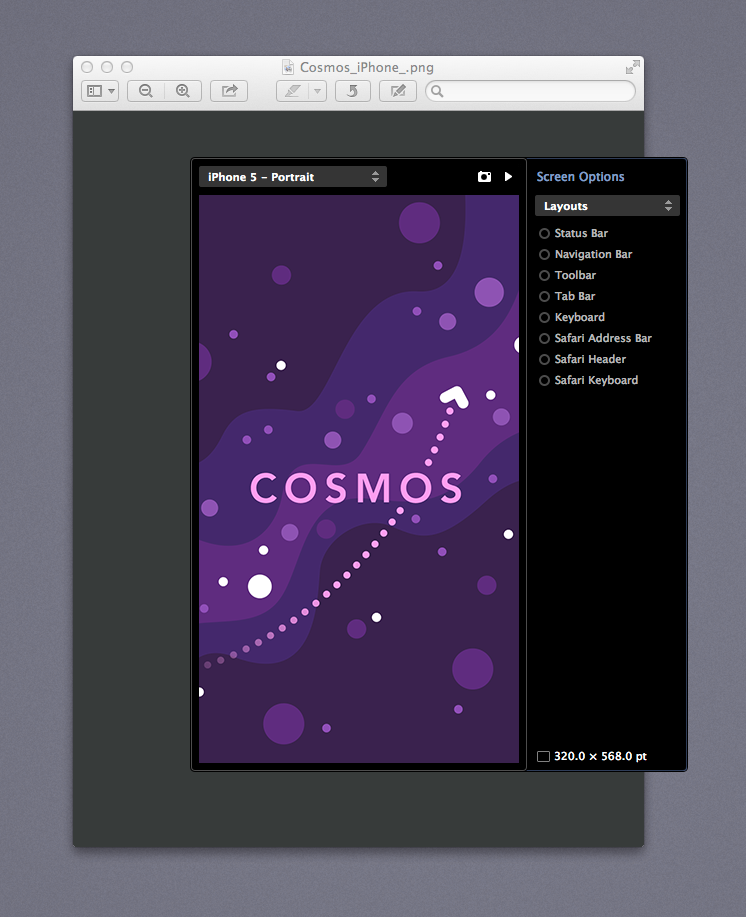
When creating a wallpaper for your iPhone or iPad, there are some constraints that need to be considered: you don't want the image on the lockscreen to be covered by the clock or unlock slider. You could create a Photoshop template, or attempt to keep track of these elements in your head, but the easiest solution is to use xScope:
- Open Screens tool
- Choose the correct size and orientation for the iOS device you have in mind for your design
- From the screen options pane, check on the "Status Bar" and "Lock Screen" boxes
- Position the Screens tool over your design and continue working, knowing exactly where your image will be covered on an actual iPhone
This technique also works wonderfully for designing websites or application interfaces, when you need to account for different on-screen elements such as tab bars, navigation bars, and the keyboard.